Read this user manual carefully before you begin to mount and use your Sublight product. The lamps can be mounted on boats, bridges, pools and ponds.
Note regarding eloxation
The aluminium surfaces of the Sublight 3LED products are protected by a powerful eloxation, which increases the corrosion resistance. During installation you must avoided to scratch the surface, remove or destroy the eloxated aluminium. It is recommended to use plastic washers where the lights would otherwise make contact with metal, as it reduces the risk of scratches. In the first generation models of the 3LED lamps there are plastic washers included. In the newer generations the endcaps is made of plastic so no washers is needed.
Optimal placement of lamps
The lights should be mounted on a level surface, in order to avoid damage to the mounting plane and the light. On an uneven plane, the light or the plane could bend. You can use washers to lift the lamp away from the plane as shown in ex. 2 and 3.

The power cord on the back of the lamp should also go through the mounting plane, but if the lamp is raised from the mount plane as in ex. 2 and 3 it might not be neccessary. Please be make sure that there may not be any forms of pull in the cord.
Attachment of sublight3 lamps

The light must be fastened securely in both mounting holes with a 5-6 mm bolts or screw. The bolts should be secured so that they do not loosen over time. Location, distance and diameter of the holes can be seen in the picture above. Holes must be sealed with suitable marine sealant in order to avoid water flowing in. Note that there is a rubber socket by the cord, and it may therefore be necessary to have a larger hole.
Electrical connection of Sublight products
Turn the power off during the installation, not only for the products but also for your own safety!
Use a fuse!
Although there is low voltage, there is a risk of shocks and shortcircuits with fire hazard as a result. Therefore, the electic system must be fitted with an adequate safety system before connecting your Sublight-lamps.
Before you connect your Sublight products you need to make sure your power supply can support the required power consumption from the lamps. You can avoid problems by taking the power to the lights directly from the battery, so you avoid taking power from the existing wires.
You must also make sure that the wires you are using to mount the lamps are dimensioned to the required power consumption.
RGB Controller
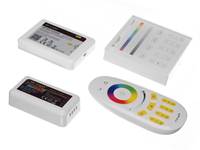
The controllers must be supplied with 12V. The input is marked with "POWER" and plus with "DC+" and negative with "DC-".
RGB Lamps
There are 4 wires in each cable that must be connected to the correct inputs on the controller.
Black wire is connected "R"
White wire connects to "G"
Blue wire connects to "B"
Brown wire connects to "V+"
Booting and using the RGB system
As the system is wireless, it is very easy to set up. The first you must do is to pair the remote with the cotnrollers. There is a small black button on the controller that you should push for a short time. After this you must chose which zone you want the controller in, and push and hold the number on the remote in, until you hear a long beep tone.
You can read more about the controller and remote in the manuals that are included with the remote (english).
Sublight RGB troubleshooting
If you have problems with your product, try the following RGB Sublight troubleshooting. If this does not resolve your problem, contact us for help.
A lamp is not turning on
Check that the RGB controller is correctly connected
Check that the RGB lamp is correctly connected to the RGB controller
A lamp has the wrong color
Check that all wires are properly connected lamp
If two colors are swapped around, it may happen that the wires are incorrectly mounted inside the lamp. Try swapping the respective wires at the controller.
If a single color will not turn on, make sure that the corresponding wire is safely connected to the controller. If they are, the lamp or controller might be defective. Contact us.


